How to use the ChannelDock ticketing system
Last updated
The ChannelDock ticketing system allows you to submit support questions, report technical problems and follow the progress of your requests directly inside ChannelDock.
By keeping all communication and updates within one ticket, our support team can investigate requests more efficiently and ensure that nothing gets lost.
Creating a new ticket
- Log in to your ChannelDock account.
- Open the Support section in the menu.
- Click Create ticket.
- Select the type that best matches your request (see Ticket types below).
- Enter a clear subject that briefly describes the issue.
- Describe your question or problem in as much detail as possible.
- Add any relevant screenshots or files.
- Click Submit ticket.
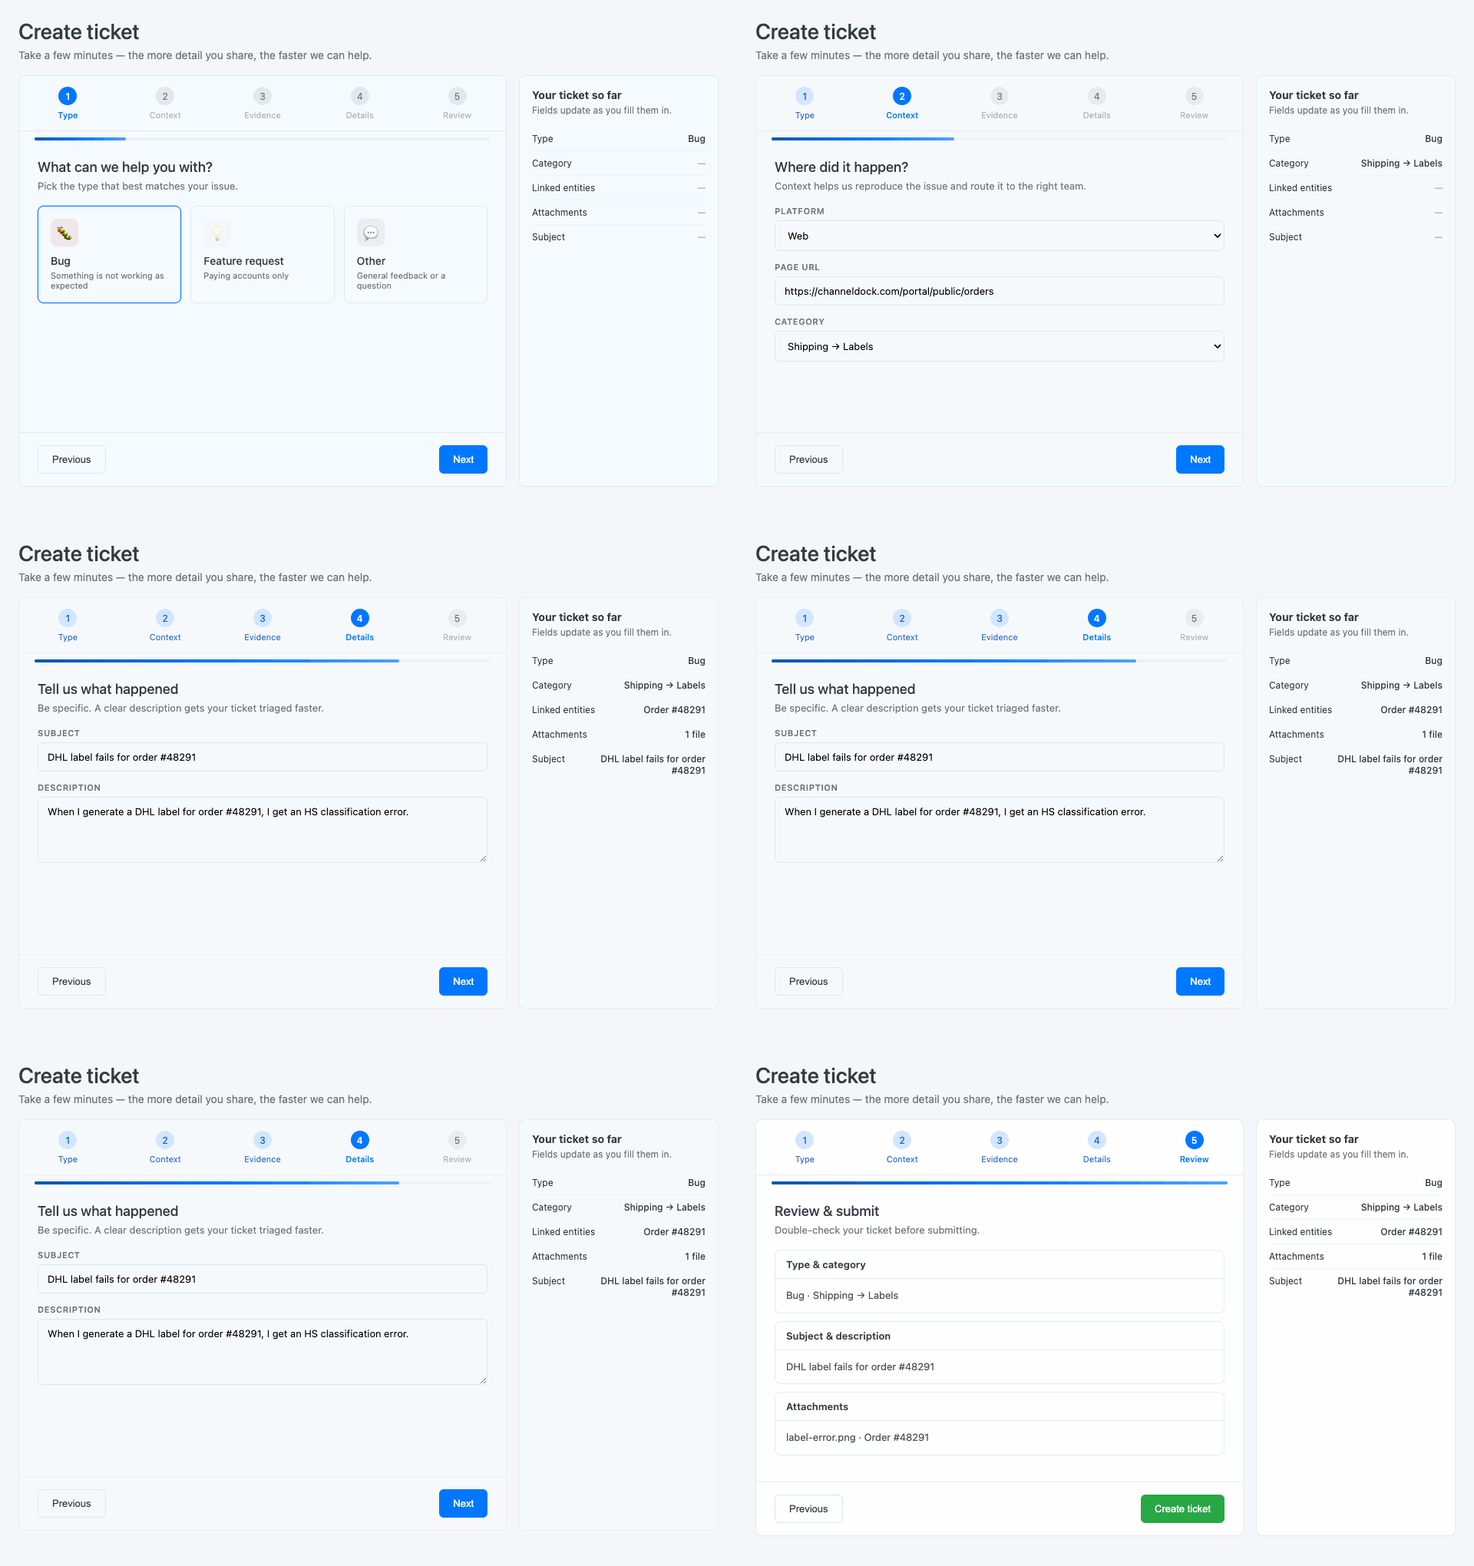
Your ticket will now appear in the ticket overview.
Ticket types
Choose the type that matches the request. Bug tickets are handled first. Questions and feature ideas submitted as bugs are reclassified and wait longer.
- Bug — something in ChannelDock is not working as expected. These tickets get the priority timetable.
- Other — a question, how-to, or general feedback. Not a bug. We aim to reply quickly, but bugs still come first. These are usually Low priority.
- Feature request — suggest something ChannelDock does not do today (paying accounts only; not on the free plan). We review requests and may build them when they fit the roadmap and capacity. There is no delivery date or resolution target. A feature request is a suggestion only — we do not promise to build it or give a delivery date.
Free users can submit bugs and questions, but cannot submit feature requests.
What information should you include?
Providing complete information helps us investigate your request more quickly. Where relevant, include:
- The affected order number, product SKU, EAN or shipment number
- The connected marketplace, webshop or shipping provider
- A description of what you expected to happen
- A description of what actually happened
- Any error messages you received
- The steps needed to reproduce the problem
- Screenshots or screen recordings
Please do not include passwords, API secrets or other sensitive login information in a ticket.
Following the progress of a ticket
Open the Support section and scroll to My tickets to view all your submitted requests.
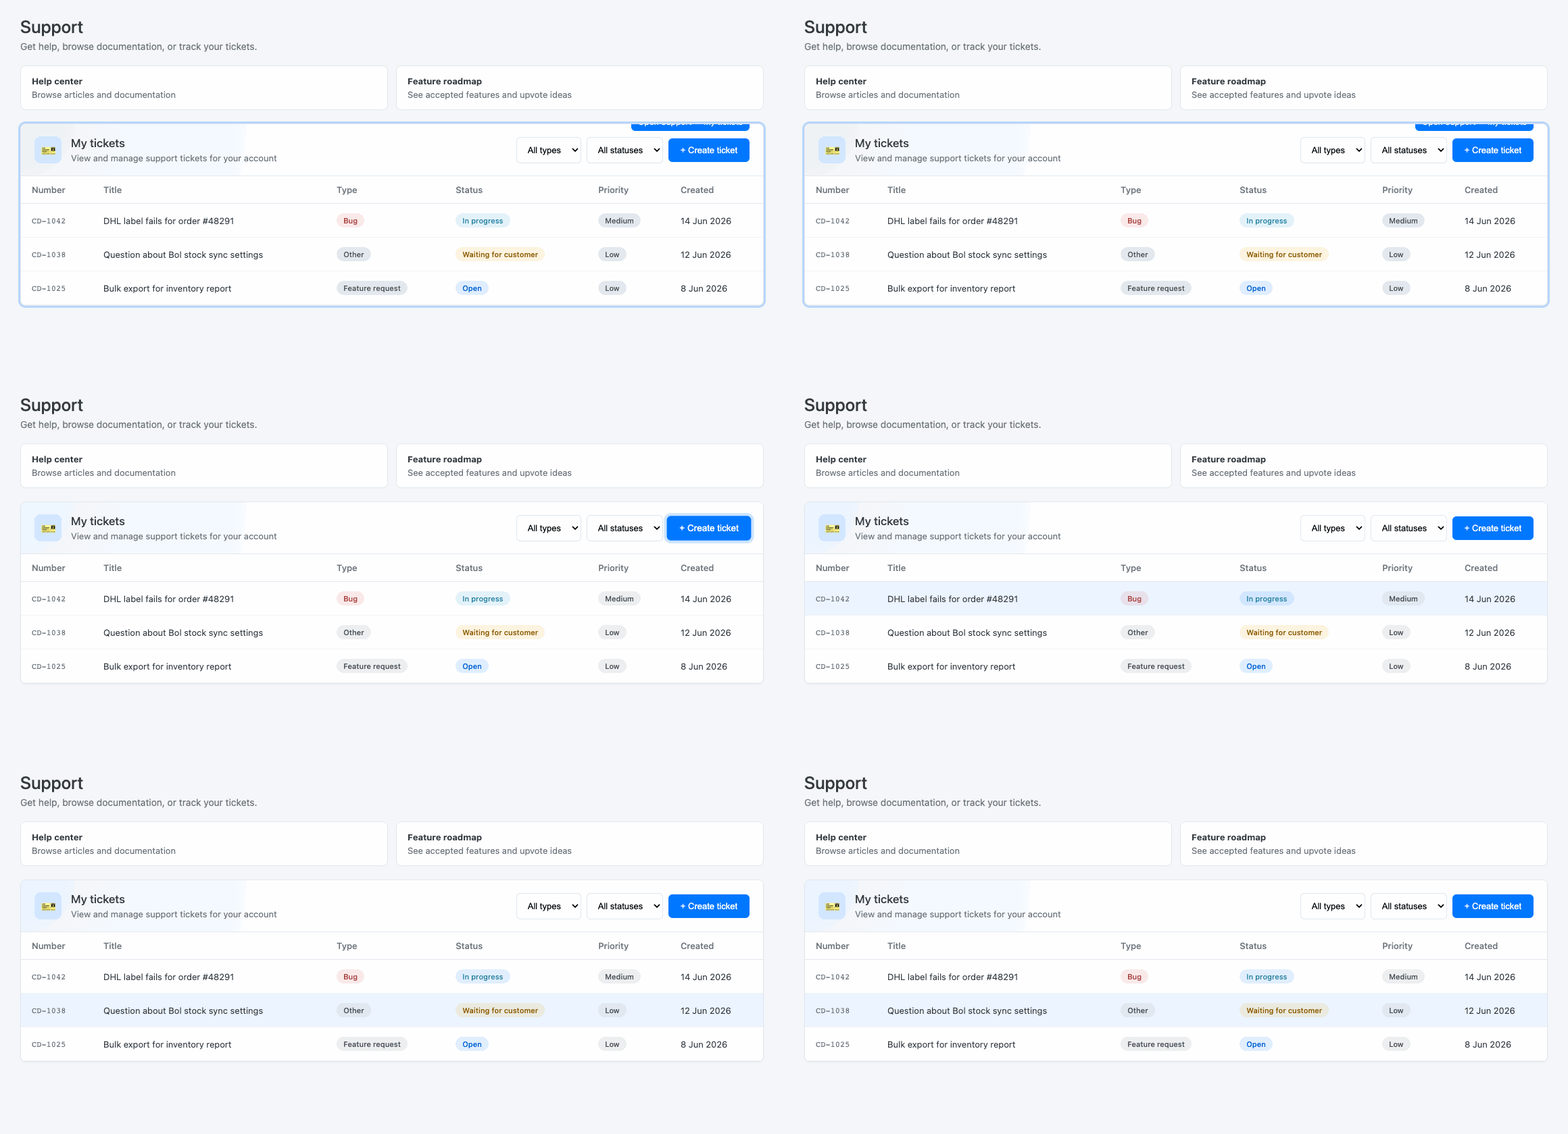
Each ticket displays its current status, such as:
- Open: The ticket has been submitted and is awaiting review.
- In progress: Our team is investigating or working on the request.
- Waiting for customer: We need additional information from you.
- Resolved: The request has been completed or answered.
- Closed: The ticket is no longer active.
Open a ticket to view the full conversation, responses from our team and any status updates.
You do not need to call or email us to confirm that a ticket was received. If it appears in My tickets, our team has it.
Priority phone support
If your account includes Priority Phone Support, the phone number is for urgent issues only — for example, when you cannot generate shipping labels or your entire sales channel is offline.
Calling to ask whether we received your ticket, or to check the status of a non-urgent request, is not urgent. Use My tickets instead: you can see when your ticket was submitted, its current status, and any replies from our team without calling.
Phone support is available Monday to Friday, 9:30 AM to 6:00 PM CET. For all other requests, use the ticketing system.
Replying to a ticket
When our support team requests more information:
- Open the relevant ticket.
- Enter your response in the reply field.
- Add any requested screenshots or attachments.
- Click Post comment.
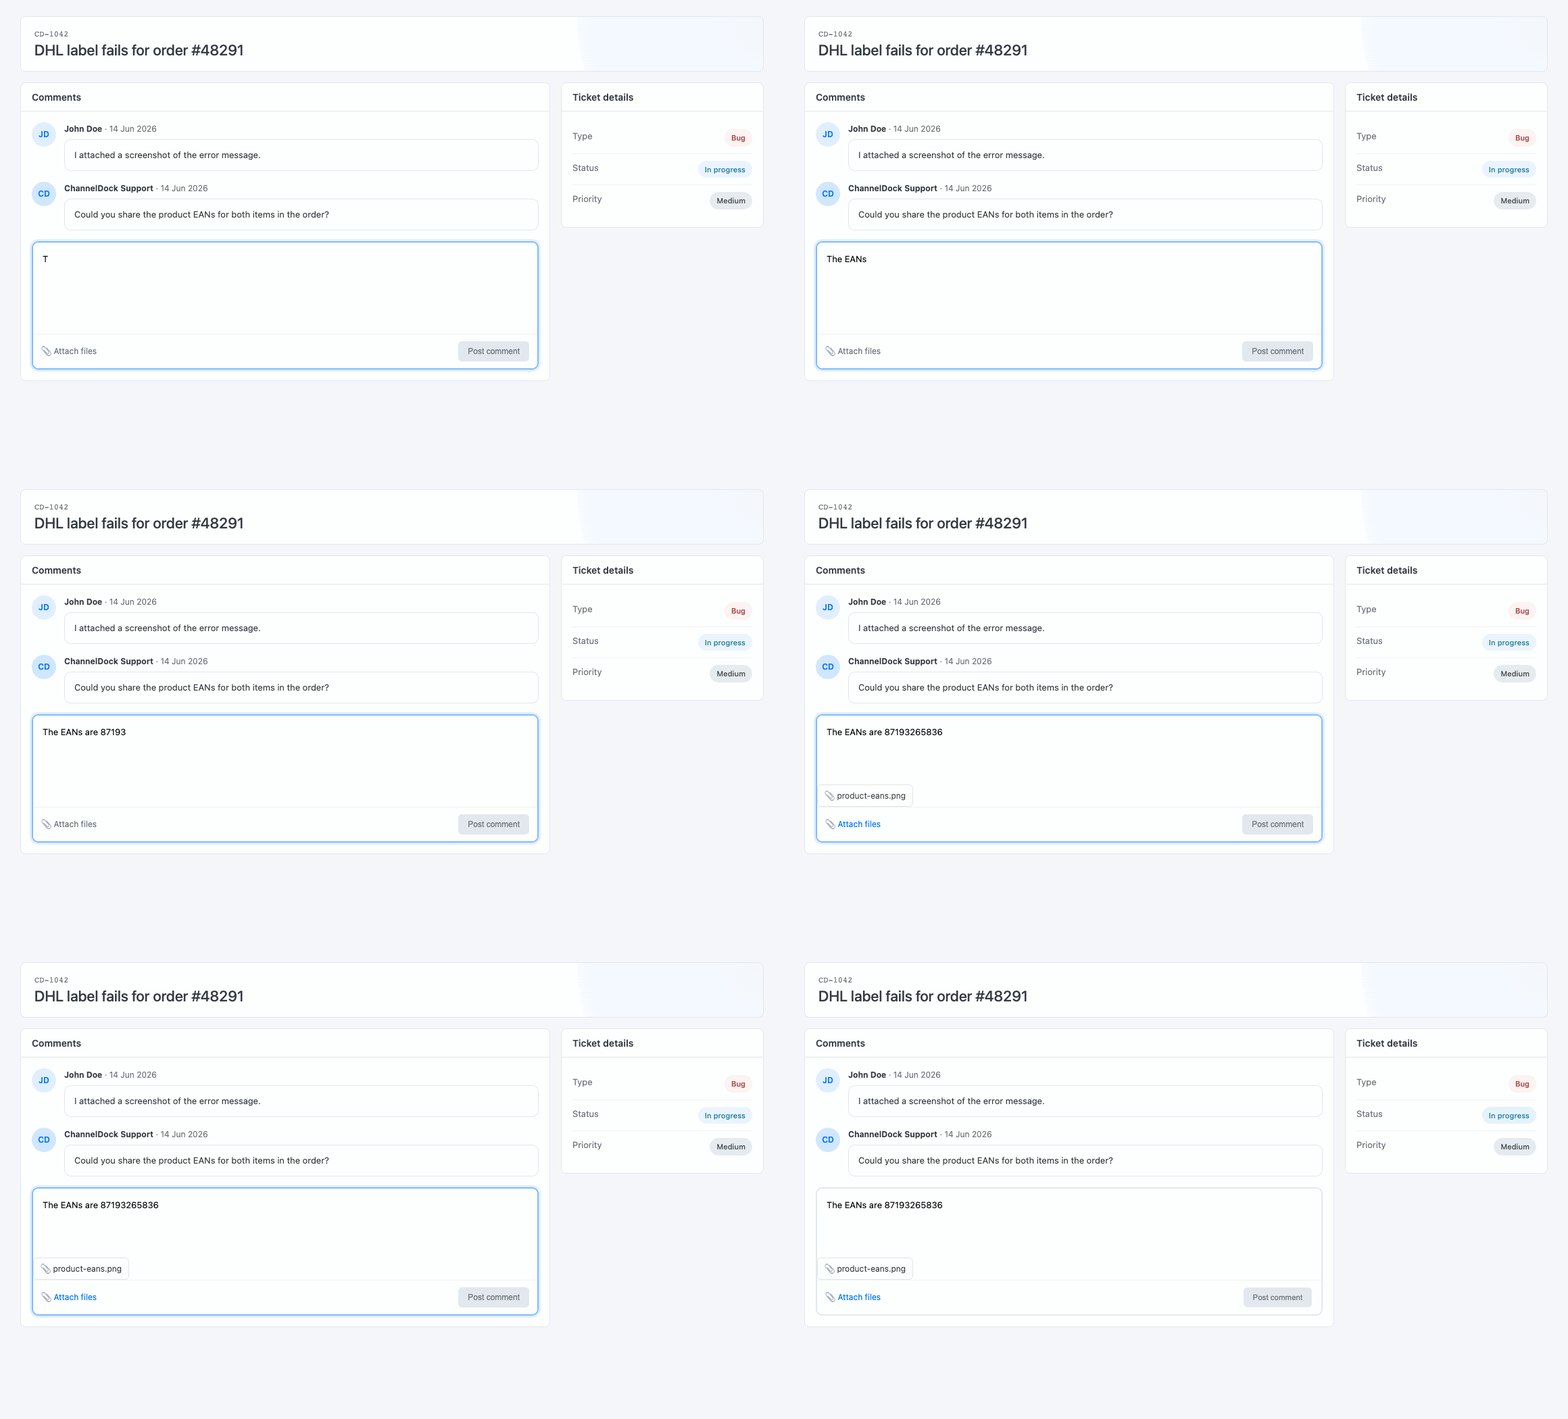
Always reply within the existing ticket instead of creating a new ticket about the same issue. This keeps all information together and prevents duplicate investigations.
Adding screenshots and attachments
You can attach screenshots, documents or other relevant files when creating or replying to a ticket.
Before uploading a screenshot, make sure it clearly shows:
- The complete error message
- The relevant order, product or page
- The date and time, where applicable
- Any settings related to the issue
Avoid cropping out information that may be useful during the investigation.
Creating separate tickets
Create one ticket for each separate question or problem.
For example, an issue with a Shopify order and a problem creating a DHL label should be submitted as two separate tickets. This allows each request to be assigned, investigated and resolved independently.
Reopening an issue
When a resolved problem occurs again, open the original ticket and check whether you can reply or reopen it.
Create a new ticket when:
- The original ticket can no longer be reopened
- The new issue has a different cause
- A different order, integration or feature is affected
Include a reference to the previous ticket when it may help our team understand the situation.
Tips for receiving faster support
To help us handle your request efficiently:
- Use a clear and specific subject
- Include relevant IDs and examples
- Describe the problem step by step
- Attach screenshots whenever possible
- Keep communication about one issue within the same ticket
- Avoid submitting the same request multiple times
Submitting duplicate tickets or contacting multiple team members about the same issue can delay the investigation because the information must first be combined.
For hours, phone support, paid consulting calls, and how bugs, questions and feature requests are treated, see ChannelDock Support Guidelines. For resolution targets, see Tickets priority levels.
Was this helpful?